Stacked PRs, Worktrees, and Git Exercises for Agentic Development
January 20, 2026
git operations really click for me.Background
Before the introduction of Agents into my workflow, I had a programming setup that I would say “got the job done” for the amount of code output I was able to meaningfully manage. I used an IDE (mostly VSCode), and a single repo checkout to handle a handful of tasks at a time. Any features or bug fixes could be managed with a few branches, and switching between them was simple. Life felt solid!
Fast forward to today, and the time to write code has dropped substantially. Whether this code is “good” or not is not the focus of this post. The key point is that my old way of managing code state was not scaling for Agentic workflows.
Agents: parallel workstreams for free
My favorite use of Agents is backlog items that would otherwise sit untouched due to time constraints. Rather than filing a bug or feature report in the backlog and hoping we can revisit it, I use these ticket writing sessions to practice defining, scoping, and writing a problem effectively, including repro instructions and validation. I then feed these tickets into an Agent, and oftentimes can come back and, with <15 minutes of additional tweaks, have an improvement to the codebase that would otherwise require more context switching.
When Agents fail, the worst case is a new ticket in the backlog for us to revisit at some point.
With the desire to enable quick kickoff loops in mind, I’m going to highlight a
few small adjustments I’ve made that have paid immensely in this new world I
live in. Starting with git worktree.
Git worktree
The first issue I ran into was how to manage these new “throwaway” Agent runs while continuing to iterate on my features. Since we were both touching the same repository, I needed some way to keep our workstreams independent.
I started with just an additional clone of the repo, which worked fine for a
single Agent. However, I started running into problems around tracking origin
state across both checkouts, and cases where multiple Agents started stomping on
each other’s work.
Enter git worktree.
git worktree allows having multiple working directories associated with a
single repository. Compared to having several clones of the same repository, one
of the biggest perks of a worktree is that all worktrees will share the same
underlying Git object database. Additionally, it solves the issue I was
running into of tracking fetch state across multiple checkouts.
Using git worktree is surprisingly simple. Say for example I was working on a
fix to types in a library for a repository foo/.
Example: Starting a branch the traditional way
cd foo/
# Make sure main up to date...
git checkout main
git pull
git checkout -b andrewpollack/fix-types
Example: Using git worktree instead
cd foo/
# Make sure main up to date...
git checkout main
git pull
git worktree add -b andrewpollack/fix-types ../foo-fix-types main
Based on running these commands, we would end up with the following directory structure:
For easier tracking, I’ve done a few things here:
- Rather than nesting the worktree in the repo itself, I place the new directory alongside the original.
- I prefix the directory with the name of the project, so sorting naturally groups work in progress together.
- I keep the worktree and branch name similar, just to make tracking easier.
Now, we can make whatever changes we want to foo-fix-types/, and not have any
concerns around affecting the original foo/ repository.
After changes are reviewed and merged, cleanup is simple. To delete both the directory and all associated metadata for tracking from your local system:
cd foo-fix-types/
git worktree remove .
Even outside of Agentic workflows, I’ve started defaulting to using worktrees to simplify jumping around between branch state.
Tmux + Tmuxinator
With worktrees, I could manage multiple branches for experiments. Running each Agent in an IDE quickly became frustrating, as I kept running the steps:
- Create
worktree, - Open window in IDE,
- Open Terminal from window in IDE,
- Run
claude
This is where I’ve started to stray away from using purely IDE, and instead
started using the terminal multiplexer
tmux.
To help automate window setup, I found a simple
tmuxinator setup worked wonders
for this. I use one window per project/worktree with multiple panes. My config
can be found on my GitHub at
andrewpollack/dotfiles,
and here is a copy below:
# To use: tmuxinator start project

name: <%= File.basename(ENV["PWD"]) %>
root: <%= ENV["PWD"] %>

windows:
  - main:
      layout: "7dde,242x54,0,0{121x54,0,0[121x27,0,0,0,121x26,0,28,3],120x54,122,0,1}"
      panes:
        - git status # left-top
        - claude # left-bottom
        - "" # right pane
From our previous example, going into the directory foo-fix-types/, we can
run:
tmuxinator start project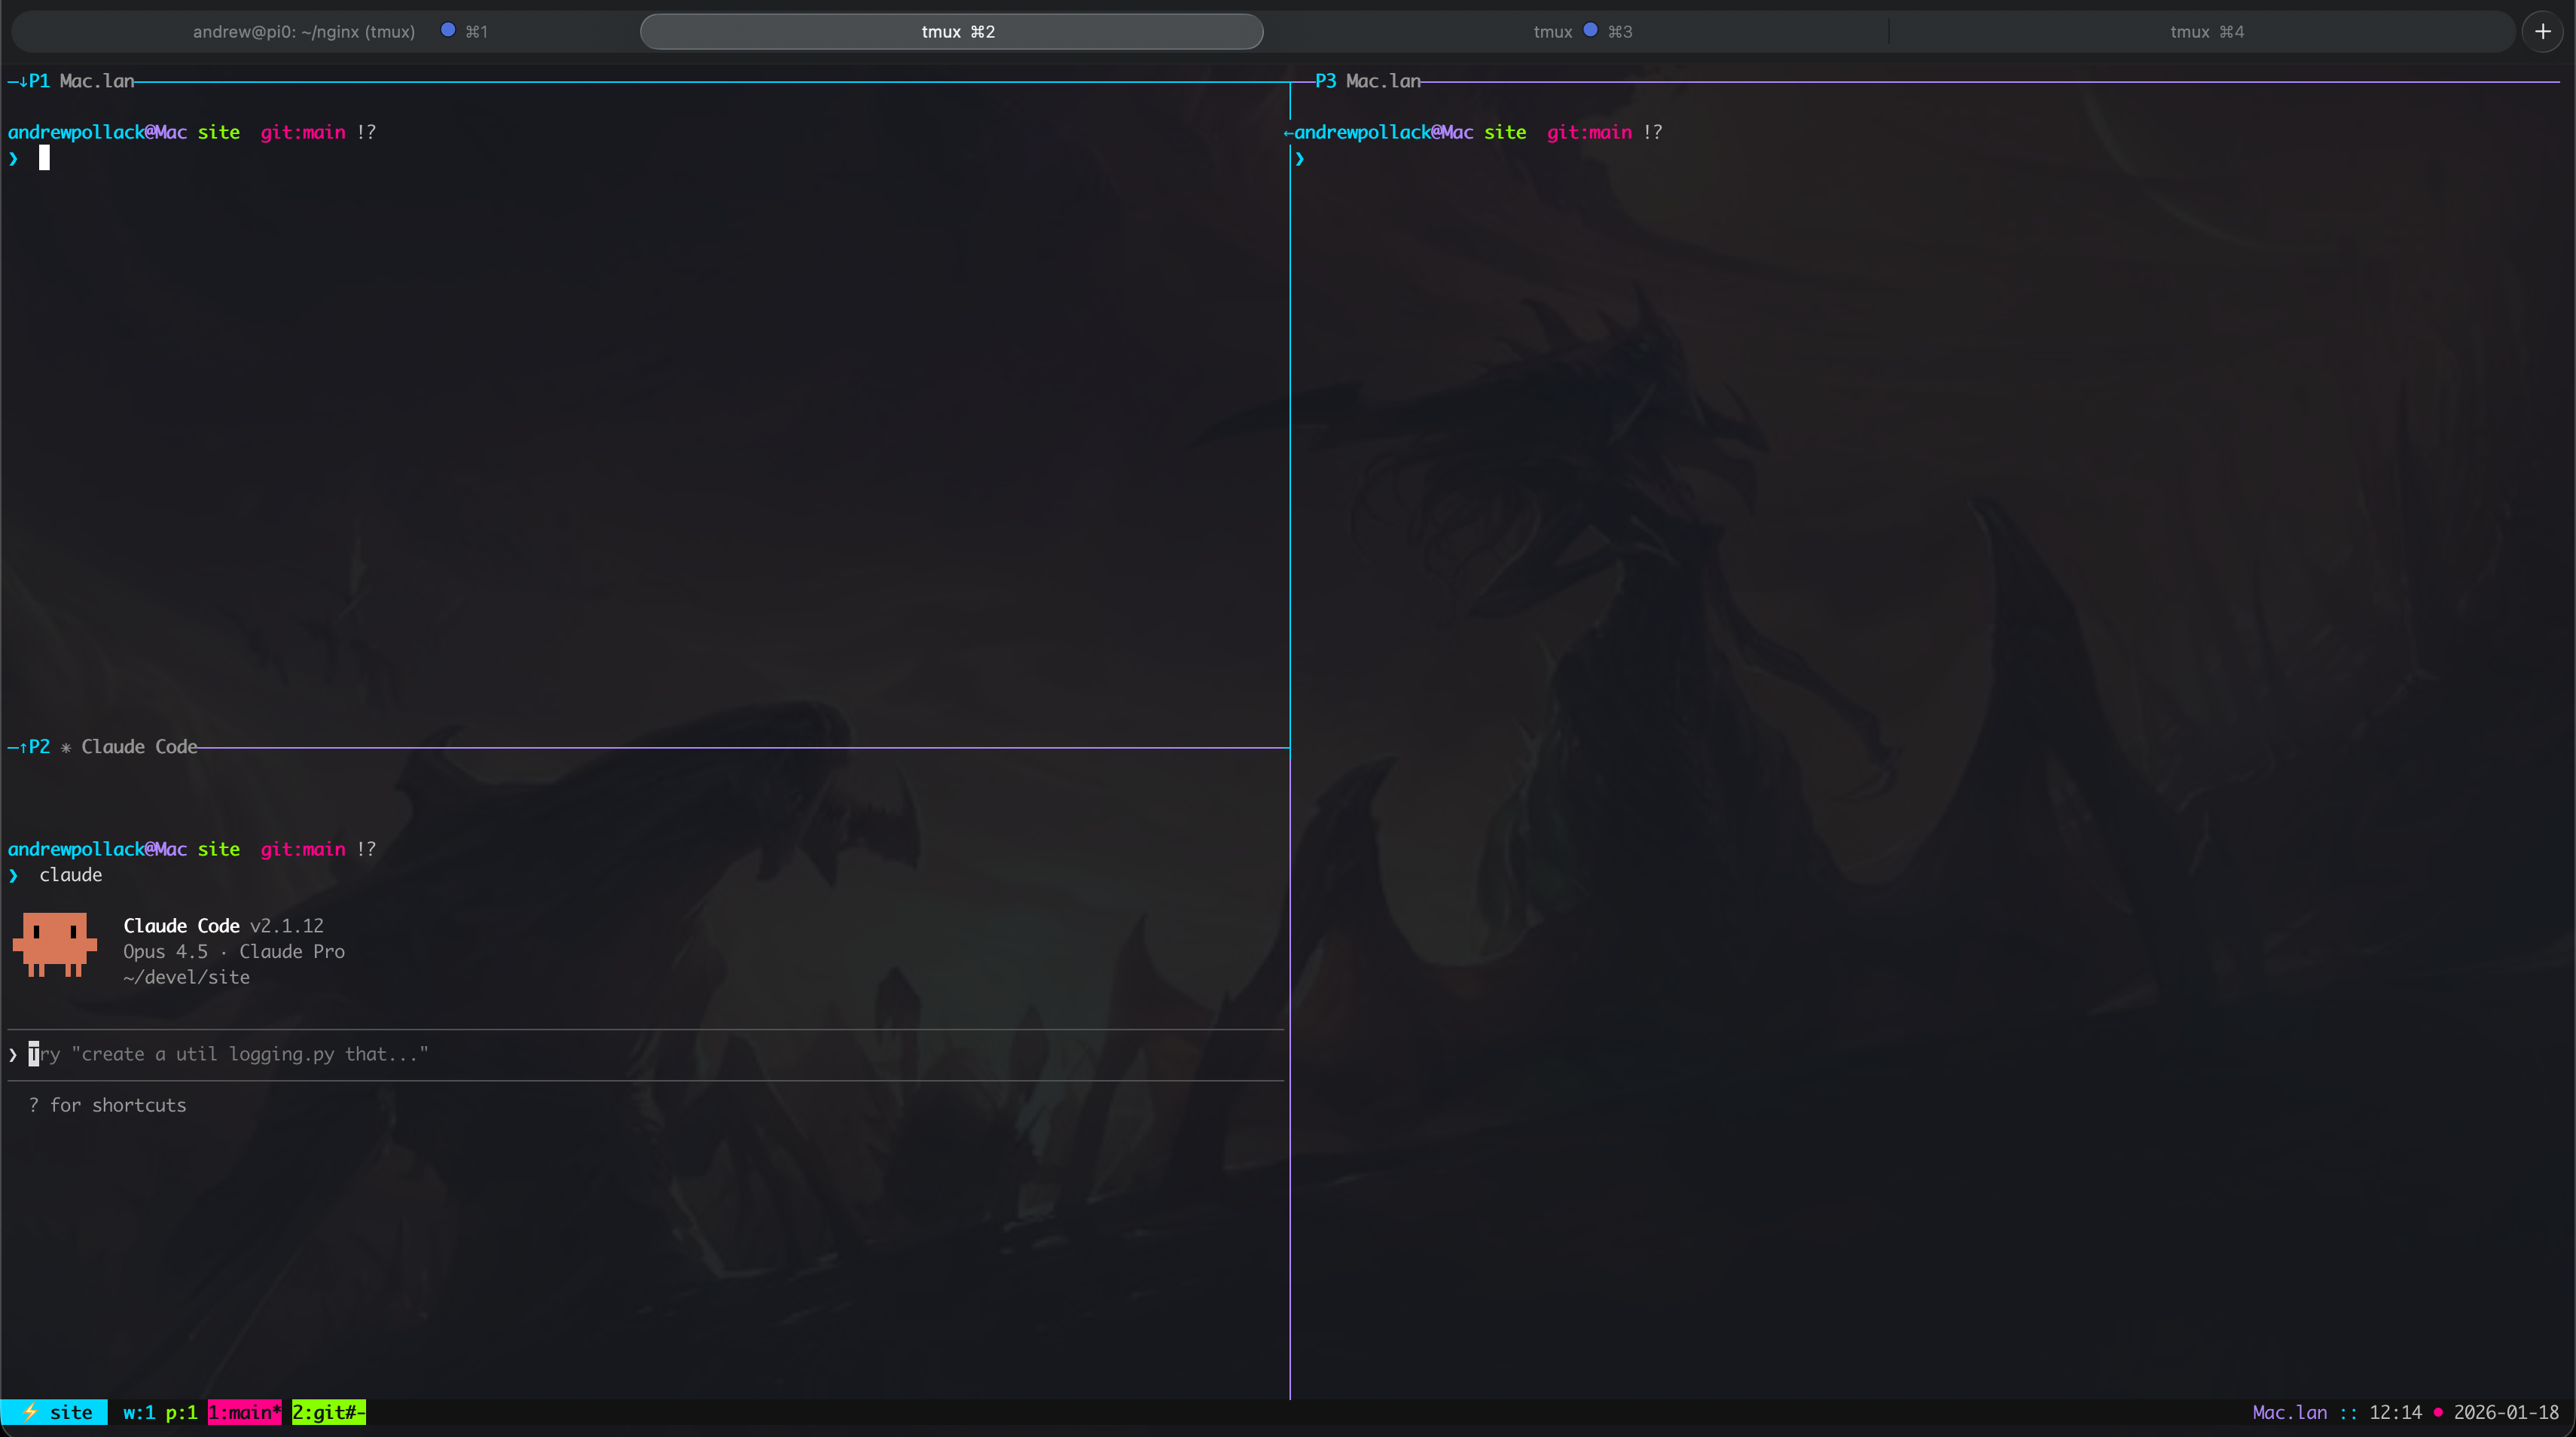 My tmuxinator setup: git status (top-left), Claude Code (bottom-left), and a
free pane for other tasks. Each project gets its own window.
My tmuxinator setup: git status (top-left), Claude Code (bottom-left), and a
free pane for other tasks. Each project gets its own window.
This gives an instant, helpful space for me to interact with Claude Code. By using one window per tab, I can jump between efforts I’m working on and comfortably push progress along.
I still oftentimes use my IDE to open a project for more surgical changes/checks, but this is now what I reach for first when launching these smaller efforts.
Aha Moment: One terminal session per worktree keeps multiple experiments isolated and reduces context switching.
Stacked PRs
With code generation and workstreams simplified, I wanted to make reviewable changes easier for myself and reviewers. It is of course on the code author to first and foremost review code as it is being generated, and to jump in to fix when needed. This is largely going to be an expertise that is built over time (I am still very much on the learning journey too).
To make reviewing this code as much of a pleasant experience to our repository reviewers as possible, we can leverage the practice of breaking up our changes into Stacked PRs.
Ben Congdon’s In Praise of Stacked PRs does a great job of highlighting what and why these are helpful. He defines the practice as:
“Stacked PRs” is the practice of breaking up a large change into smaller, individually reviewable PRs which can depend on each other, forming DAGs
Example DAG:
[main] <- [Refactor Foo] <- [Feature Baz]Here, PR 1 refactors Foo, and PR 2 adds feature Baz. Each can be reviewed independently while maintaining the dependency chain.
There are many tools that can be used for managing Stacked PRs. For GitHub, I personally use the tool Revup.
Brief aside: Tidy First?
A book I recently read and loved was Kent Beck’s Tidy First?. One takeaway: you can bake refactoring into your feature work by tidying first, making the actual change easier and cleaner. This motivated the example below.
Git Exercise: Managing Stacked PRs with Interactive Rebase
With these tooling adjustments, we can now manage multiple worktrees and break
changes into smaller, more reviewable Stacked PRs. I want to finish out this
post with a practical “aha” moment I had managing my git state that I’ve been
using nearly daily. I highly recommend running this by hand, since it’s only
through typing the commands that these have really stuck with me.
Scenario Overview
This exercise covers two common scenarios:
- Making a change to an earlier commit in a PR stack using interactive rebase,
- Splitting a commit into two separate commits.
For these exercises, I will be using terminology from Revup in the commit message to reflect Stacked PRs. In Revup:
- Each commit has a Topic, defining a branch.
- A Topic can be Relative to another, marking it as a dependent.
Example stack:
This dependency chain lets us reason about how changes flow between PRs.
Task: Clamp Counter Values
We’ll work on a simple Go Counter struct. Our task is to clamp the Counter
value between a minimum and maximum.
Here is our starting Go module counter.go:
package counter

type Counter struct {
  value int
}

func New() *Counter {
  return &Counter{value: 0}
}

func (c *Counter) Increment() { c.value++ }
func (c *Counter) Decrement() { c.value-- }
While we could add this capability in one go, it is oftentimes easier to review changes when they can be broken up into two changes:
- Refactor: centralize value updates (preserves current behavior)
- Feature: clamp counter values
Step 1: Refactor
Our first change is to centralize value updates into one method, making any clamping behavior only require one point of adjustment:
func (c *Counter) Increment() { c.applyValue(c.value + 1) }
func (c *Counter) Decrement() { c.applyValue(c.value - 1) }

func (c *Counter) applyValue(v int) {
  c.value = v
}
We commit this as a single topic:
git add counter.go
git commit <<'EOF'
counter: centralize value mutation behind applyValue

Topic: refactor-set-value
EOF
Commit Graph after Step 1:
Step 2: Feature: clamping
Now, we add clamping logic:
func (c *Counter) applyValue(v int) {
  if v < 0 { c.value = 0; return }
  if v > 10 { c.value = 10; return }
  c.value = v
}
Commit as a dependent Stacked PR:
git add counter.go
git commit <<'EOF'
counter: clamp value updates to valid range

Topic: clamp-value
Relative: refactor-set-value
EOF
Commit Graph After Step 2:
Feedback: Make Max Configurable
We receive the feedback on our first PR:
blocking: We shouldn’t hardcode bounds. Let’s make the max configurable, but keep the default behavior the same.
Pause for a minute and think on how we would handle this change. Specifically, one that requires making updates to both commits.
This is where interactive rebases come in. We can use git rebase -i main to
initiate an interactive rebase:
git rebase -i mainThen, replace pick with edit to directly edit the commits we want to modify:
edit 3e063e7aee62e5dae22fd6fbd8b2210d8aa157be # <commit-hash-refactor>
edit bbe59f21c5e16383b78929315454df2095fd5844 # <commit-hash-clamp>
This is what we will be doing next to resolve:
Step 3: Make Max Configurable
Update our Counter struct to have a configurable max:
type Counter struct {
  value int
  max   int
}

func New() *Counter {
  return &Counter{value: 0, max: 10}
}
Amend the refactor commit:
git add counter.go
git commit --amend
# Keep Topic: refactor-set-value
Continue the rebase onto the next commit:
git rebase --continueUpdate applyValue in the next commit:
func (c *Counter) applyValue(v int) {
  if v < 0 { c.value = 0; return }
  if v > c.max { c.value = c.max; return }
  c.value = v
}
Continue the rebase:
git add counter.go
git rebase --continue
Aha Moment: Interactive rebase lets you safely adjust multiple dependent commits without creating messy extra commits. Even though we could amend the commits individually, I find running with interactive rebases works better as a default practice.
Stack state:
Step 4: Splitting the Head of the Stack
We previously combined refactors. Now we can split them for clarity:
git rebase -i main

edit d8bead2deab381a941db718596a6c7331d2b2de7
pick c5832aea22cfa6d37b80f4303e5e45656b3cf21f
Once on our refactor commit, we use git reset HEAD~ to unstage the last
commit:
git reset HEAD~We adjust the file to commit in two passes:
# Update file...
git commit <<'EOF'
counter: centralize value mutation behind applyValue

Topic: refactor-set-value
EOF

# Update file...
git add counter/counter.go
git commit <<'EOF'
counter: add configurable max to Counter

Topic: configurable-max
Relative: refactor-set-value
EOF
Continue the rebase and amend the final PR:
git rebase --continue
git commit --amend
# Topic: clamp-value
# Relative: configurable-max
Final Commit Stack
And that is it! This is our final reviewable stack:
Takeaways
- Git Worktree: Use
git worktreeto manage multiple branches simultaneously without the overhead of separate clones. This keeps your main checkout clean while experiments run in parallel. - Tmux + Tmuxinator: One terminal session per worktree keeps experiments isolated and reduces context switching. Automate your setup to make spinning up new workstreams effortless.
- Stacked PRs: Break large changes into small, reviewable increments. This makes code review easier and keeps your commit history meaningful.
- Interactive Rebase: Use
git rebase -ito safely modify, split, or reorder commits in a stack without creating messy fixup commits.
These tools have greatly improved how I work, even beyond Agents. I highly recommend starting with just getting comfortable with worktrees, and bringing in the others as they naturally come up as bottlenecks in your workflow.